Please note: if buying outside of UK or Gibraltar, email us and we shall refer you to the appropriate regional office for purchase, thank you!
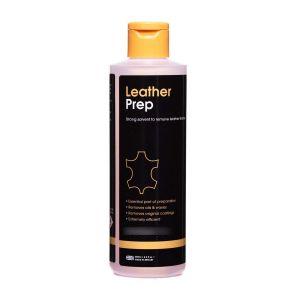
LEATHER PREP
A strong solvent based cleaner, used for removing the manufacturer’s finish from leather.
- An essential part of the preparation process
- Removes oils and waxes from the leathers surface
- Removes original coatings to ensure good adhesion
- Extremely efficient
- Can help to soften leather by removing old dried out coatings
Leather Prep is an essential part of any re-colouring or leather restoration process. The Leather Prep will remove the manufacturers finish from the leather, meaning that any repairs or colour work is being done directly to the leather, and not over any old and worn coatings. Along with removing the original finish, the Leather Prep will also remove any solvent soluble waxes, oils and silicones, which could otherwise cause adhesion problems down the line if not removed. Leather Prep is a very quick an effective solvent for removing these coatings, especially when used in conjunction with an Abrasive Pad.
As the old coatings harden over time, the Leather Prep will also help soften the leather as the old, worn coatings are removed.
As an additional use, the Prep can also be used as a rub off solution for antique finished pigmented leather. Depending on how durable the top coat is, the Leather Prep may be too strong, but can be weakened by adding in Alcohol Cleaner.
Leather Prep is Suitable For
Leather Prep is suitable for use on furniture, car interiors, clothes, footwear, handbags and accessories.
An incredibly powerful remover, it is designed for use on:
Aniline and Semi-Aniline Leather
Pigmented Leather (not suitable for Finished Split)
Two Tone, Mottled and Antique Finished Leather
Oil and Wax Pull Up Leather
Bi-cast Leather
Vinyl and Faux Leather, including Bonded Leather
Suede/Nubuck
Leather Prep Coverage and Shelf Life
Store in a cool dry place, away from direct sunlight.
Store between 8°C and 25°C.
Once opened, use within 3 years.
Leather Prep Instructions
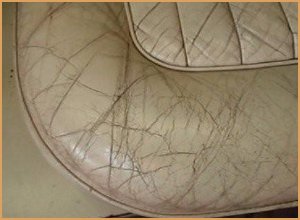
 An old car seat showing heavy cracking. The majority of the cracks though, are in the Colour & Finish not the leather itself. |
Step 1. Apply the Prep using a cloth or abrasive padThe main use of the Leather Prep is to remove old, worn, and hardened coatings on leather. These are the original Colours and Finishes applied to the leather in the tannery, that over the years harden and become unsightly. |
 Removing the finish has restored the leather to its natural state, ready for a fresh coating to be applied. |
Step 2. Once prepped the leather can be sanded & repairedUsing the Leather Prep and an Abrasive Pad to remove the manufactured coating, will remove much, if not all of the cracking, making the leather look much better & feel a great deal softer. The leather can now be sanded smooth and any damage to the leather can be repaired. |
 The finished result. After repairs were made, a new coating of colour and finish was applied giving the leather a natural look, and silky soft feel. |
Removing the old coatings makes a much better end result, not only in terms of appearance, but also for touch & comfort when used.The alternative method to repair an old seat like this would be to fill the cracks and apply even more colour and finish on top. This will result in a plastic like finish, and the leather would be even harder! Not softer. |
|
|
|
If the leather is old, and you want to remove the manufactured finish (as indicated in the above photos), then the best way to prep the leather is with an Abrasive Pad. Wet the leather with the Prep and rub with the pad, the Prep will start to emulsify the old coating and the pad will loosen it. Wet a cloth with the prep and/or spray some prep onto the leather and wipe over with the cloth. This will remove any excess colour/finish still on the leather.
If the leather isn’t badly damaged it doesn’t require such drastic action. The leather can be simply wiped down with a cloth dampened in prep.
In both cases though, you should expect to see colour transferred onto the cloth, indicating the Prep is working.
Q. I have removed a lot of colour when using the prep, is this ok?
A. Once the leathers finish has been removed, you will start seeing colour being transferred onto your cloth; this is completely normal. If you have proceeded to further clean the area with the Prep it will inevitably remove more colour, taking you closer to the aniline leather. There is no harm in doing this, especially if the original colour was badly cracked or felt rough.
Q. How do I know when I have removed enough finish?
A. Once the manufacturers finish has been removed, you will start to see colour transferring onto your cloth. This generally means you have removed enough of the finish to proceed to the next stage.
If the leather is cracked, you should continue using the Prep to remove some of the colour, as there is a high chance this will also remove the cracks.
Q. Are there any other products to use to complete the preparation process?
A. Yes, to make removing the manufacturers finish easier, we recommend using an Abrasive Pad.
Once the finish has been removed, you should clean a slightly bigger area with the Alcohol Cleaner. This will neutralise any leftover residues of Prep.
Q. Can this be used as a general leather cleaner?
No, this product is designed for removing the toughest of coatings, therefore would remove colour form your leather if used as a cleaner. The Leather Prep should only be used as part of the preparation stage when re-colouring leather.
To clean your leather, we recommend our Leather Cleaner.
Trustpilot Reviews for the Leather Prep 5*
From Manufacturer


