Please note: if buying outside of UK or Gibraltar, email us and we shall refer you to the appropriate regional office for purchase, thank you!
LEATHER REPAIR PAINT
Our all-in-one Leather Repair Paint colours and seals leather in one application
- Extremely flexible & hard wearing
- Available in any colour
- No need for separate coat of finish
- For quick, simple, and professional repairs
- Colourfast and scuff resistant
- Can be applied by sponge, brush, or spray
- Formerly called Self Seal Colourant
About Leather Repair Paint
This all-in-one leather colour restorer combines the flexibility, coverage, and quality of our standard Leather Colourant with the self-sealing properties of our Leather Finish. You can use the Leather Repair Paint to repair any type of colour damage to sofas, car seats, clothing, handbags and all other leather items.
It is the perfect solution for repairing scuffs, scratches and colour loss. If you need to restore a large item of leather (i.e. a full sofa or car interior) then we would recommend using our Leather Colourant Kit. However, the Leather Repair Paint can still be used for these larger jobs if you wish. It can easily be applied by sponge, brush or spray.
The Leather Repair Paint is supplied in a standard range of common leather colours, but it can also be supplied in specific car colours or matched to any colour you require.
Standard colours come with an in-built sealant that has a satin finish, but custom colour matches can be made with any finish required. A thin coat of Leather Finish can also be used to adjust the sheen.
Leather Repair Paint is Suitable For
Leather Repair Paint is ideal for use on leather car interiors, leather furniture, leather handbags, clothes, shoes, equestrian leather, motor bike leathers – pretty much any item made from leather!
It can be used on all types and all colours of leather including:
Aniline and Semi-Aniline Leather
Pigmented Leather/top coated leather
Oil & Wax Pull-Up Leather
Two-Tone, Mottled & Antique Finished Leather
Bicast leather
Vinyl and faux leather, including bonded leather
Leather Repair Paint Coverage and Shelf Life
50ml for fixing scuffs and scratches.
250ml for fixing colour loss or slightly larger areas.
1 litre will cover roughly 6m² (or roughly a three-seat sofa).
Store in a cool dry place, away from direct sunlight.
Storage temperature should be between 8°C and 30°C.
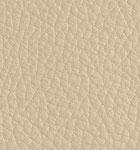
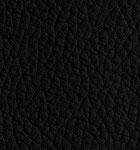
Tesla Colour Chart
S Model
We have several options when it comes to ordering colours of Leather Repair Paint:
- Standard Colours: 24 of our most popular colours.
- Mixing Colours: 16 base colours which can be mixed together to achieve any colour.
- Custom Colours: a much larger range of pre-mixed colours made to order.
- Car Colours: custom colours from different car manufacturers that have been pre-matched to the brand manufacturer colour codes.
- Colour Matching: bespoke colours, matched exactly to a sample.
IMPORTANT: The colours shown here are dependent upon screen settings or monitor calibration, they are a guide only. The actual colour may vary.
How to use Leather Repair Paint
Step 1 – Cleaning
In all circumstances, we recommended fully cleaning the entire item of leather that you want to repair. Not only is this good practice, but if the leather is dirty, it can cause a freshly repaired area to stand out. Clean the leather using our Leather Cleaner.
Step 2 – Preparation
If you’re just repairing a small scuff or scratch, you don’t need to do any additional preparation other than clean the leather. However, if the repair is in a high contact area (e.g. car seat bolster, steering wheel, seat cushion) then you should wipe it with Alcohol Cleaner.
If you’re repairing an area of colour loss smaller than an A5 piece of paper, then you should clean the area with Alcohol Cleaner before applying any colour.
In all other instances, or for the best preparation procedure, you should clean the leather with Leather Prep, followed by Alcohol Cleaner.
Step 3 – Repairs
If the leather is damaged, it is at this stage where you would make any repairs using our Leather Repair Products.
Step 4 – Applying Leather Repair Paint
The last step is actually quite easy! The colour can be applied by brush, sponge or airbrush. Simply apply the colour onto the leather in a thin coat and dry it with a hairdryer.
Additional coats can be applied to build up the colour.
Always make sure you shake the bottle well before using and check the colour on a hidden area first.
The paint will dry within a few minutes (or leave about 30 mins if drying naturally). Before applying any other products such as protectors, you should wait one week.
Leather Repair Paint FAQ
Q. Will this affect the quality of the repair compared to applying Leather Colourant and Leather Finish?
A. No, it will not. We have developed this range with professional users in mind to make quick and easy colour touch ups in homes.
The Leather Repair Paint is just as flexible, it has same colour coverage and quality of our Leather Colourant range, with the added benefit of sealing itself whilst it dries.
Q. Do I still need to apply Leather Finish?
A. No, this is the benefit of using Leather Repair Paint. The colour seals itself whilst it dries. The only time you would need to apply Leather Finish would be to match the shine of the leather.
All of our pre-mixed colours come in a satin finish. However, if you are using our colour match service, we will also match the shine for you.
Q. What leathers can I use this on?
A. Our Leather Repair Paint can be used on all leather types and colours of leather. It is also safe to use on vinyl and faux leather, including bonded leather.
Q. Can I use this on an aniline (absorbent) leather?
A. Yes, in fact this is great for aniline leather as you are limiting the amount of surface coatings being applied which will help to keep the leather looking more natural and softer.
Q. Will this rub off onto clothes?
A. No, once the Leather Repair Paint has dried it is completely colourfast. There is no need for added topcoats as it seals itself.
Trustpilot Reviews for the Leather Repair Paint 5*
Reviews from manufacturer


